
Best for / Not best for
Best for: DMs and GMs who need a practical RPGMapEditor workflow for one map-making task: choose the right size, build the playable space, save the source project, and export a PNG for DnD, TTRPG, VTT, Roll20, Foundry VTT, print, or sharing.
Not best for: generic map theory, hidden keyword pages, fake popularity claims, or promises that RPG Map Editor exports Roll20 dynamic lighting, native Foundry scene JSON, walls, doors, tokens, or automation data.
Use a clean PNG and known pixel scale
Roll20 imports flat images as map backgrounds. RPG Map Editor should hand Roll20 a clear PNG with known dimensions and a grid plan you can reproduce inside the VTT.
Before uploading, write down the map's square count and pixels per square. That saves trial-and-error when aligning the Roll20 page grid.
- Export one flattened PNG.
- Keep square count and pixel dimensions nearby.
- Use simple contrast around walls and terrain boundaries.
Align the page grid after upload
Create a Roll20 page, set dimensions to your map's square count, place the PNG on the map layer, and resize it until the platform grid matches the artwork. If you exported without a visible grid, use Roll20's grid as the source of truth.
- Put map art on the map layer, not the token layer.
- Use page dimensions that match columns and rows.
- Check alignment near all four corners.
Lighting and tokens remain in Roll20
RPG Map Editor exports the visual map. Dynamic lighting, tokens, character sheets, fog, and automation are configured in Roll20 after import.
- Do not expect wall data or token automation in the PNG.
- Keep a backup copy of the editable map project.
- Test with one player-view preview before game night.
How to do it in RPGMapEditor
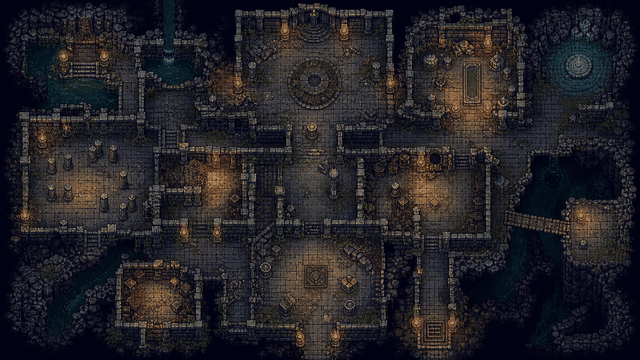
Open RPGMapEditor, start from a blank map or demo, paint the terrain that defines movement, place props only where they affect play, keep the grid readable, save the map when you need to return, then export a PNG for Roll20, Foundry VTT, print, or sharing.
Use the screenshot or map example above as proof of the workflow: the article should show an actual editor-created map, not a stock fantasy image.
Use this article in the editor
Turn the guide into one map: pick a grid size, build the example, save it, and export once.